Showing posts with label tutorial. Show all posts

Monday, July 9, 2012

Tutorial - Framing Your Cross Stitch Using Random Stuff (in This Case, a Jewelry Box Lid)

Ohhhh, Monday.  My crafting weekend was so productive - I knit a bunch of pieces, I added a super-soft lap blanket to my Etsy shop, I re-photographed some dish cloths, I worked on the dragon, and I designed a new veterinary-inspired embroidery project.  Now, I have to go back to my desk job!  :(

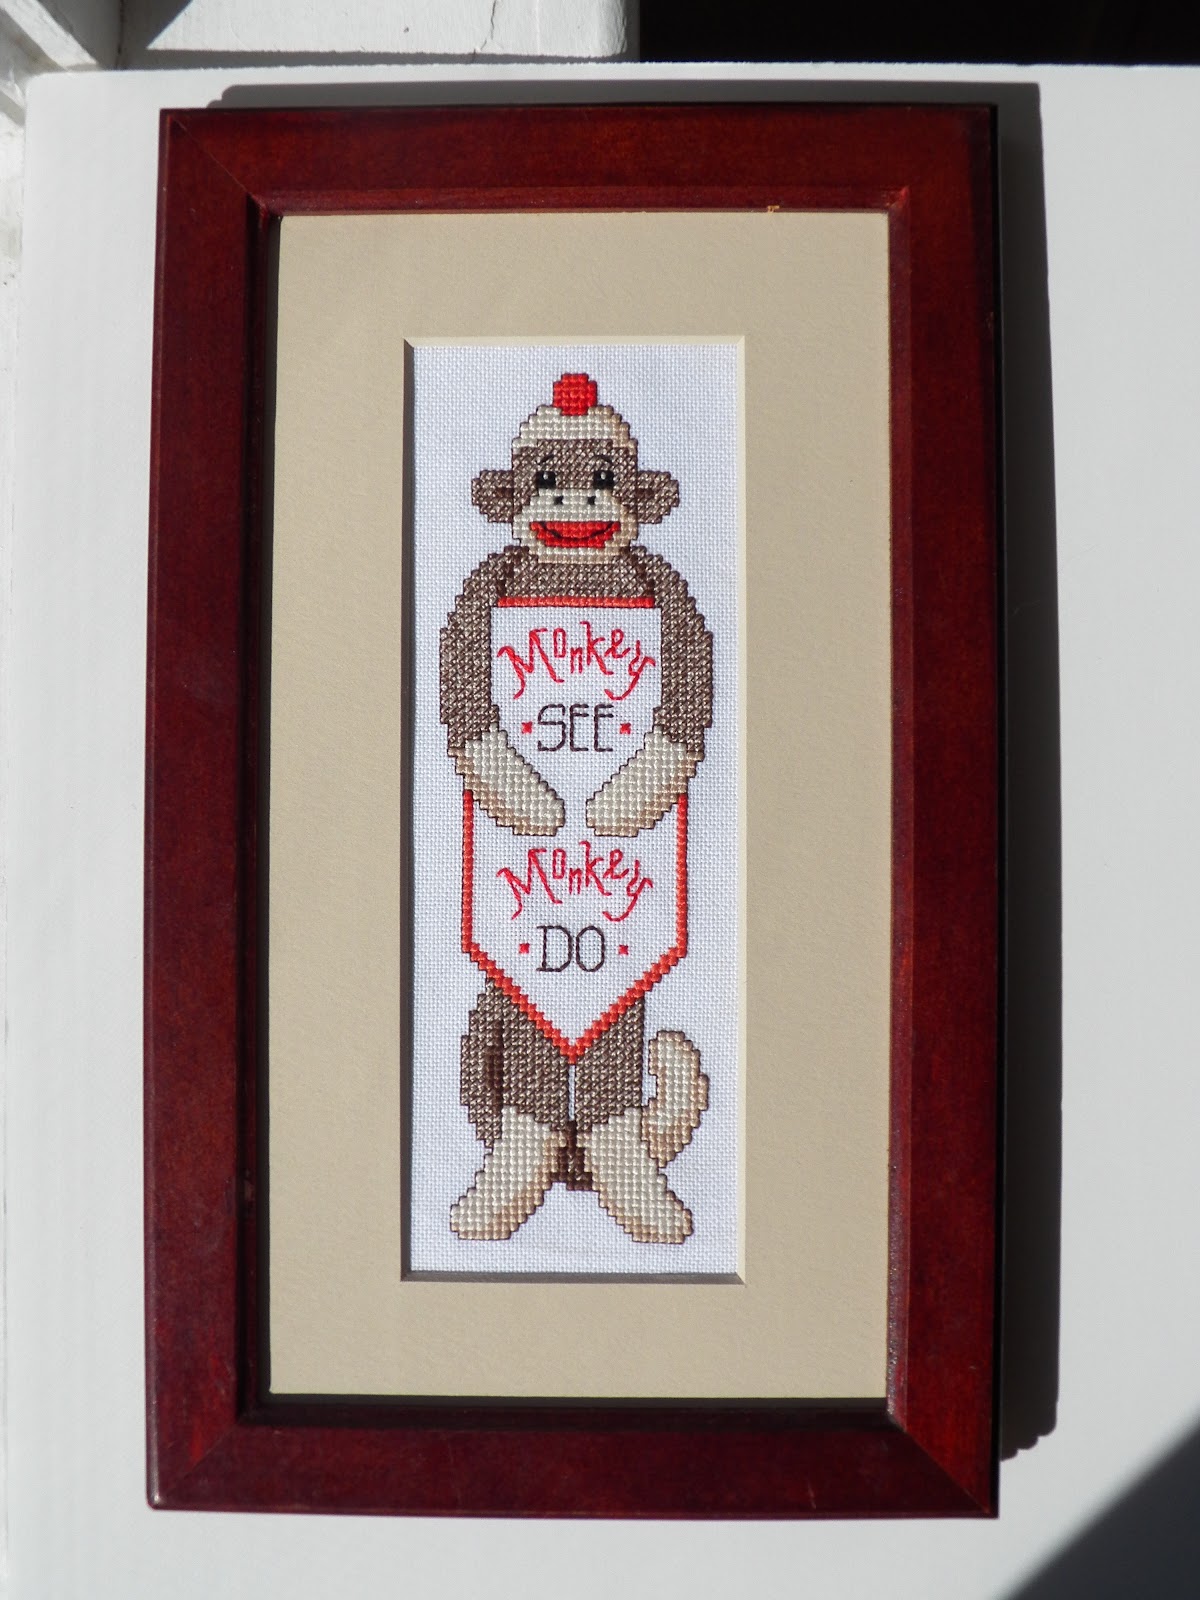
However, I wanted to finally get this tutorial posted.  As you might recall, I finished a cross stitched sock monkey some time ago that was originally intended to be a bookmark, but I decided to frame him instead because he was just so darn cute.  Unfortunately, because he was so long and narrow (you know, like most bookmarks are), it was tough to find a frame that would fit him.  I was having trouble justifying spending beaucoup d'argent on a custom-made frame for such a small piece, so when I found a jewelry box at Goodwill that looked to be about the right size, I decided I would try to turn it into a picture frame.  And - it worked!  Here's how I did it.

Here are "before" pictures of the jewelry box and the monkey.  (Hey, 1985 called - they want their jewelry box back!)


The jewelry box lid comprises the following layers, from outside in: a wooden frame, tapestry and padding, a backboard, a layer of glue, and a mirror.  So, the first order of business was to remove the mirror from the inside of the lid.  Disclaimer: you may want to wear leather gloves and goggles for this part.  I removed the mirror by sticking a table knife under the mirror and gently prying it from the backboard.  DO THIS SLOWLY AND CAREFULLY!  If you are not patient, you could shatter the mirror and really screw up your hands (or eyes, hence the safety disclaimer above).  This jewelry box was probably about 20 years old, so the glue was not quite as strong as it might have been 20 years ago (thank God).


This view shows the glue attaching the mirror to the back board and how I carefully used the knife to pry off the mirror.  You are looking down between the back board (top, light brown) and the mirror (bottom, blue-ish), parallel to the long axis of the jewelry box.


A word of caution: the glue was very difficult to remove from my shiny table knife after I finished removing the mirror!  You may either want to use an old piece of flatware that you can throw away or make sure you have some kind of solvent (paint thinner, maybe?) around to help remove the glue if you are using a "real" knife.

Here is what the inside of the lid looks like without the mirror.  This is the back board - you can still see remnants of wood glue.
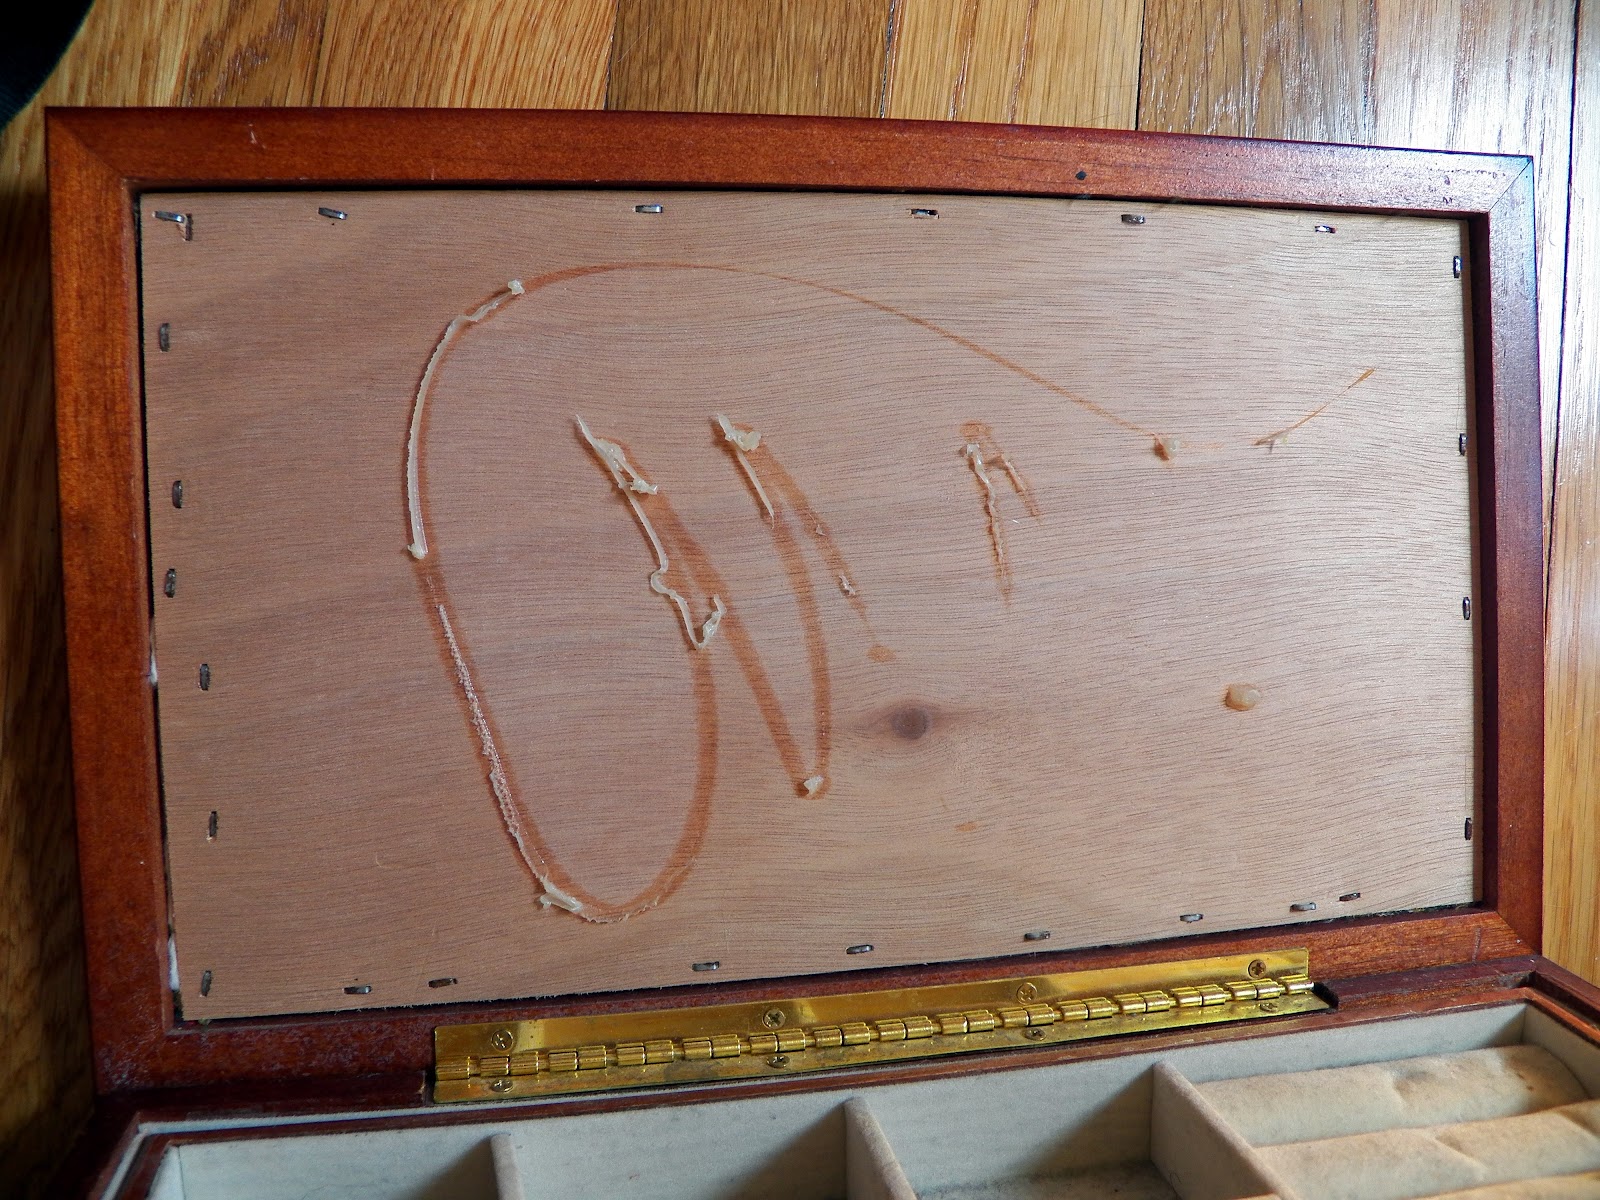

You can see staples around the edge of the back board.  These staples go through the back board, the padding, and the tapestry fabric, attaching all of the layers to the inside edge of the frame.


I removed the back board and the tapestry and padding by gently pressing around the outside edge of the frame (i.e., pressing the fabric down into the jewelry box from the outside) to release the staples.


You can see the cross section here: the tapestry fabric and the padding are sandwiched between the back board (top, yellowish) and the frame (bottom, red-brown).


Some staples pulled through the fabric and the back board, so I used pliers to remove them from the frame.


Finally, I used a Phillips-head screwdriver to remove the hinge from the lid.


Ta da!  Here is what the "naked" frame looks like, once the mirror, back board, tapestry fabric, staples, and hinge have all been removed.


I cut a piece of acid-free foam core that was 1/4" smaller on each side than the back opening of the frame.  I usually like to stretch my finished cross stitch pieces and mount them on foam core using thread, but I didn't have enough excess fabric to do that with this piece and still use this frame, so I used acid-free double-sided tape to attach the piece to the foam core instead.


I splurged and had a mat cut to fit the frame to cover up the edges of the fabric.  Then, I attached framing clips and a wire to the back of the frame so he could hang on the wall.  Aaaaaand... here is the finished product!


I think he looks quite adorable!  :)

So, there you go!  For small or irregularly shaped pieces, it really makes a lot of sense to try to find frames wherever you can, instead of paying to have a frame shop make a custom frame for you.  Maybe you will find a frame in an unexpected place, too!

Thanks for reading and for all of your thoughtful comments.  I hope this little project breaks up the monotony of your Monday!

-Erin
Less Bitching, More Stitching!

Sunday, June 24, 2012

My Framing Tutorial Was Featured on Daily Dose of Handmade!

Hello, readers!  Check out today's newest post over at Daily Dose of Handmade (DDH) - I created a framing tutorial, and it has been featured as Sunday's Guest Blog article!  It includes step-by-step instructions for mounting your finished needlework pieces and fitting them to a frame.  Many thanks to Julie and Cylene at DDH for this collaborative project.  Check it out!

"Beautiful Bird" - and how to frame it - over at DDH!
As promised, I will have another tutorial posted here at Less Bitching, More Stitching! later this week.  That tutorial will show you how to make a frame out of a jewelry box.  Keep an eye out over the next few days - it should be finished soon.

We have had a few people join the blog since my last post - so welcome to our new readers!  Thank you for subscribing; I am glad to have you here!

I hope you are all having a wonderful weekend!

-Erin

Saturday, May 12, 2012

Pillow-Style Hanging Door Ornament with Cross Stitched Owl Appliqué (Tutorial) - Cross Stitch

This is a finishing tutorial for making a pillow-style hanging door ornament with an appliquéd cross stitch design.  It has lots of pictures to show you what to do!  I like this method because all of the stitches are hidden - I use a line of buried stitches to close the last side after the piece is turned back right-side out.  This is a trick I learned in vet school doing intradermal skin sutures!  It is a little tricky but turns out wonderfully once you master it.  If this is your first time making a pillow-style ornament, I suggest using a fabric with a little more body than felt, because you have to tug the stitches tight, and this can pull right through felt if you're not careful.

So, I woke up this morning and found a little blue owl.  (I finished him last night - he is from the book "Hold That Thought Bookmarks" by Sandy Orton)  What should I do with him?

"Wise Owl" by Sandy Orton

I thought, "Maybe I'll try my hand at appliqué and turn him into a door hanger!"  First, I ironed him and trimmed him down to size (using very pointy scissors to keep the edges tidy).  Then, I applied Fray Check to the edges to prevent them from fraying.

Next, I cut two pieces of rectangular blue felt and attached him to the center of one of them with fusible webbing and a steam iron.


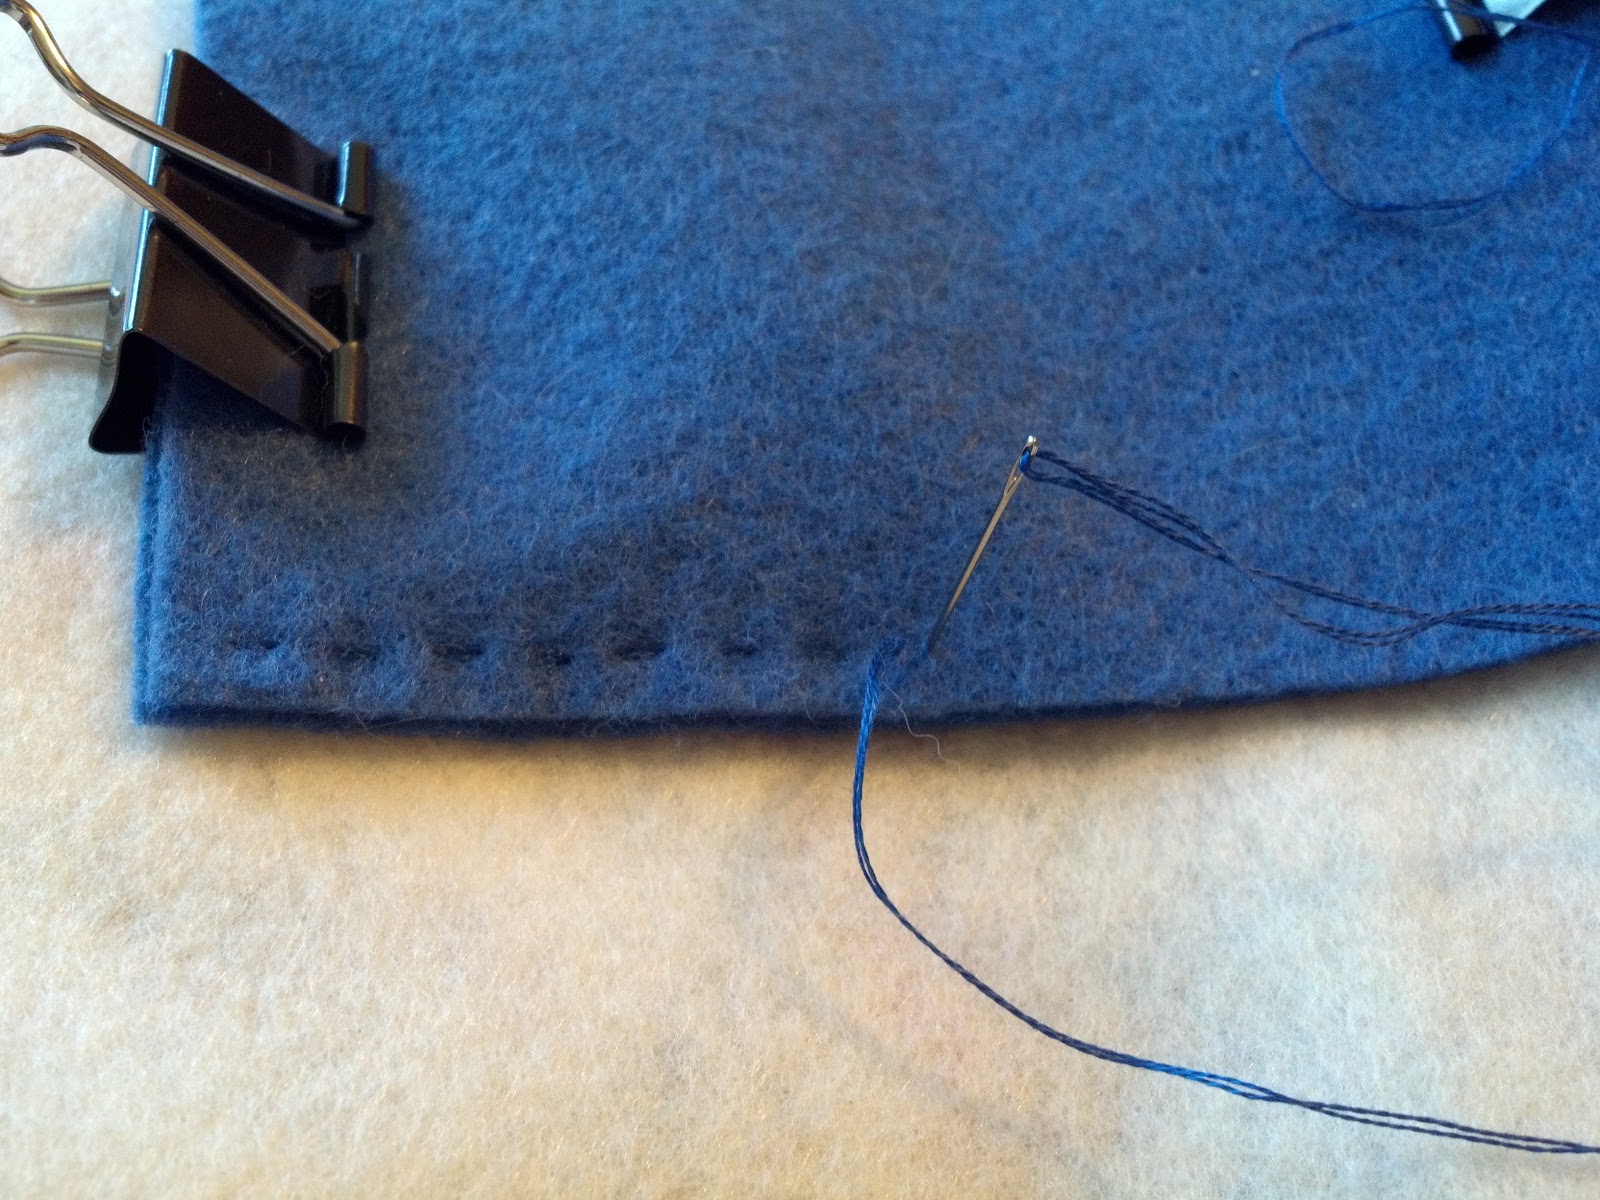
Next, I cut five pieces of polyester quilt batting (the stuff that comes in sheets, you can use polyfill if you prefer) slightly smaller (about 1/2" smaller on each side) than the blue squares.  I sandwiched the owl on the inside of the two pieces of felt (you stitch the piece together inside-out - if you are using regular fabric, put the pieces wrong-side out), and I used binder clips to hold the fabric in place. Then, using blue embroidery floss that matched the felt, I stitched a running stitch around three of the sides, leaving one of the shorter sides open so I could flip the piece inside out later.  Leave the needle and thread attached (don't cut them off!) so you can sew the last side.

Binder clips hold the felt together while I work a running stitch along the sides

Leave one side open so you can flip the piece right-side out

Next, carefully flip the piece right-side out.  You can use a chopstick to push out the corners and make them sharp.  Hello, Mr. Owl!  Put the stuffing inside, making sure there aren't any folds or bumps.

Flipped and stuffed!

Here is where it gets a little tricky - the buried stitching.  First, take the needle and push it from the outside to the inside of the felt (one piece of felt only) on the open edge.  Then, push it back out from the inside to the outside on the opposite piece of felt.

Stitch from the outside in...

...and then from the inside out.

Now, take the needle back to the opposite side of the fabric, across the edge, and stitch outside-in, inside-out again.

Stitches should go across the seam (two stitches shown)

Once you get a few stitches placed, use a retractable pen or pencil to tuck the fabric edges down into the seam.

Use a pen or pencil to tuck the fabric edges into the seam

After you have placed four or five stitches and tucked the edges down inside the seam, pull the stitches tight so they hardly show.  Then, take the needle and push it through the fabric parallel to the seam on the outside of the piece, about 1/4" from the edge.  It helps if you can get the fabric edges tucked in along the entire seam before you start these stitches - hold it the seam place with your fingers while you stitch.

Push the needle through the fabric, parallel to the seam, on the outside of the piece

Make the next stitch on the opposite side of the seam.  Place the beginning of this stitch slightly before where the last stitch ended, but on the opposite side, so the stitches "overlap" each other as they alternate along opposite sides of the seam (think of how two rows of bricks look next to each other).

Place the next stitch on the opposite side of the seam, overlapping the end of the last stitch

Continue this across the seam until the edge is closed.  The stitches should still be loose at this point.

Continue these stitches across the seam

When you reach the end of the seam, you can use a pencil again to make sure the edges of the fabric are all tucked inside the seam.  All of the stitches should look like this:

Seam closed, stitches still loose

Now, one at at time, tighten the stitches from the beginning of the row to close the seam completely and hide the thread.

Tighten the stitches one by one to close the seam and hide the thread

There!  It's like magic!  That was the hard part.  Now, put the needle back into the seam and tie the loose end to the last stitch to end the thread.  Don't cut the thread yet - we will hide the end later!

Tie the loose end to the last stitch in the seam

Now, this last part is called "smurfing" - it's another technique borrowed from the operating room.   Take the needle, put it back down into the seam, and make sure the point comes back up through the fabric fairly far away from the end of the seam (about an inch or so).  [You can see how the owl's head feather is coming up - I cut a few tiny pieces of fusible webbing to stick under it to fix this.]

Bring the end of the thread through the fabric about 1" from the end of the seam

Cut the thread close to the fabric.  It might leave a tiny tag - if it does, just move the fabric around until the loose end slips back under the fabric.

Cut the thread close to the fabric

The arrow shows my little thread tag - just work the fabric until it slips back under

That's it!  You have now sewn an invisible seam.

To make the hanger, I twisted a cord out of a few of the floss colors used in the design and tacked it around the outside of the piece.

Ta da!  All done!

My cross stitched owl doorknob hanger!