This is a finishing tutorial for making a pillow-style hanging door ornament with an appliquéd cross stitch design. It has lots of pictures to show you what to do! I like this method because all of the stitches are hidden - I use a line of buried stitches to close the last side after the piece is turned back right-side out. This is a trick I learned in vet school doing intradermal skin sutures! It is a little tricky but turns out wonderfully once you master it. If this is your first time making a pillow-style ornament, I suggest using a fabric with a little more body than felt, because you have to tug the stitches tight, and this can pull right through felt if you're not careful.
So, I woke up this morning and found a little blue owl. (I finished him last night - he is from the book
"Hold That Thought Bookmarks" by Sandy Orton) What should I do with him?
 |
| "Wise Owl" by Sandy Orton |
I thought, "Maybe I'll try my hand at appliqué and turn him into a door hanger!" First, I ironed him and trimmed him down to size (using very pointy scissors to keep the edges tidy). Then, I applied
Fray Check to the edges to prevent them from fraying.
Next, I cut two pieces of rectangular blue felt and attached him to the center of one of them with fusible webbing and a steam iron.
Next, I cut five pieces of polyester quilt batting (the stuff that comes in sheets, you can use polyfill if you prefer) slightly smaller (about 1/2" smaller on each side) than the blue squares. I sandwiched the owl on the inside of the two pieces of felt (you stitch the piece together inside-out - if you are using regular fabric, put the pieces wrong-side out), and I used binder clips to hold the fabric in place. Then, using blue embroidery floss that matched the felt, I stitched a running stitch around three of the sides, leaving one of the shorter sides open so I could flip the piece inside out later. Leave the needle and thread attached (don't cut them off!) so you can sew the last side.
 |
| Binder clips hold the felt together while I work a running stitch along the sides |
 |
| Leave one side open so you can flip the piece right-side out |
Next, carefully flip the piece right-side out. You can use a chopstick to push out the corners and make them sharp. Hello, Mr. Owl! Put the stuffing inside, making sure there aren't any folds or bumps.
 |
| Flipped and stuffed! |
Here is where it gets a little tricky - the buried stitching. First, take the needle and push it from the outside to the inside of the felt (one piece of felt only) on the open edge. Then, push it back out from the inside to the outside on the opposite piece of felt.
 |
| Stitch from the outside in... |
 |
| ...and then from the inside out. |
Now, take the needle back to the opposite side of the fabric, across the edge, and stitch outside-in, inside-out again.
 |
| Stitches should go across the seam (two stitches shown) |
Once you get a few stitches placed, use a retractable pen or pencil to tuck the fabric edges down into the seam.
 |
| Use a pen or pencil to tuck the fabric edges into the seam |
After you have placed four or five stitches and tucked the edges down inside the seam, pull the stitches tight so they hardly show. Then, take the needle and push it through the fabric parallel to the seam on the outside of the piece, about 1/4" from the edge. It helps if you can get the fabric edges tucked in along the entire seam before you start these stitches - hold it the seam place with your fingers while you stitch.
.jpg "Push the needle through the fabric, parallel to the seam, on the outside of the piece") |
| Push the needle through the fabric, parallel to the seam, on the outside of the piece |
Make the next stitch on the opposite side of the seam. Place the beginning of this stitch slightly before where the last stitch ended, but on the opposite side, so the stitches "overlap" each other as they alternate along opposite sides of the seam (think of how two rows of bricks look next to each other).
 |
| Place the next stitch on the opposite side of the seam, overlapping the end of the last stitch |
Continue this across the seam until the edge is closed. The stitches should still be loose at this point.
 |
| Continue these stitches across the seam |
When you reach the end of the seam, you can use a pencil again to make sure the edges of the fabric are all tucked inside the seam. All of the stitches should look like this:
 |
| Seam closed, stitches still loose |
Now, one at at time, tighten the stitches from the beginning of the row to close the seam completely and hide the thread.
 |
| Tighten the stitches one by one to close the seam and hide the thread |
There! It's like magic! That was the hard part. Now, put the needle back into the seam and tie the loose end to the last stitch to end the thread. Don't cut the thread yet - we will hide the end later!
 |
| Tie the loose end to the last stitch in the seam |
Now, this last part is called "smurfing" - it's another technique borrowed from the operating room. Take the needle, put it back down into the seam, and make sure the point comes back up through the fabric fairly far away from the end of the seam (about an inch or so). [You can see how the owl's head feather is coming up - I cut a few tiny pieces of fusible webbing to stick under it to fix this.]
 |
| Bring the end of the thread through the fabric about 1" from the end of the seam |
Cut the thread close to the fabric. It might leave a tiny tag - if it does, just move the fabric around until the loose end slips back under the fabric.
 |
| Cut the thread close to the fabric |
 |
| The arrow shows my little thread tag - just work the fabric until it slips back under |
That's it! You have now sewn an invisible seam.
To make the hanger, I twisted a cord out of a few of the floss colors used in the design and tacked it around the outside of the piece.
Ta da! All done!
 |
| My cross stitched owl doorknob hanger! |


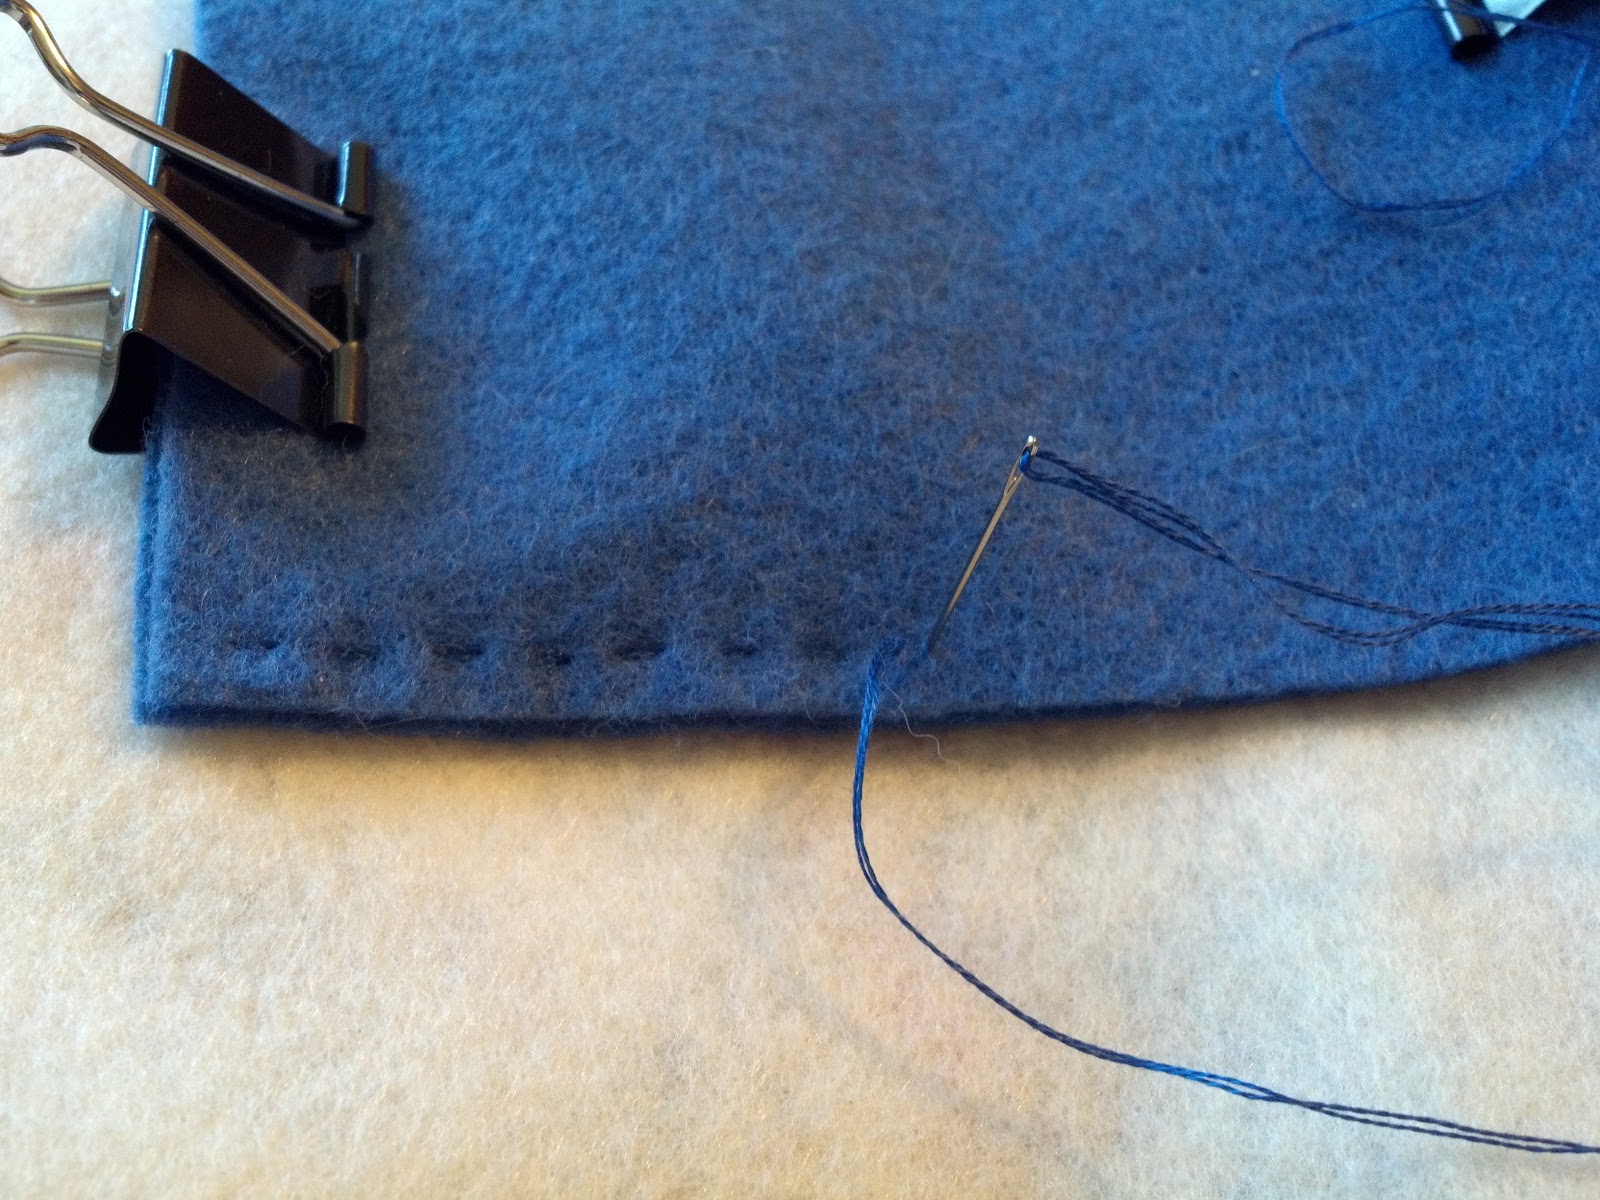


.jpg "Push the needle through the fabric, parallel to the seam, on the outside of the piece")


