Showing posts with label tips. Show all posts

Saturday, May 12, 2012

Pillow-Style Hanging Door Ornament with Cross Stitched Owl Appliqué (Tutorial) - Cross Stitch

This is a finishing tutorial for making a pillow-style hanging door ornament with an appliquéd cross stitch design.  It has lots of pictures to show you what to do!  I like this method because all of the stitches are hidden - I use a line of buried stitches to close the last side after the piece is turned back right-side out.  This is a trick I learned in vet school doing intradermal skin sutures!  It is a little tricky but turns out wonderfully once you master it.  If this is your first time making a pillow-style ornament, I suggest using a fabric with a little more body than felt, because you have to tug the stitches tight, and this can pull right through felt if you're not careful.

So, I woke up this morning and found a little blue owl.  (I finished him last night - he is from the book "Hold That Thought Bookmarks" by Sandy Orton)  What should I do with him?

"Wise Owl" by Sandy Orton

I thought, "Maybe I'll try my hand at appliqué and turn him into a door hanger!"  First, I ironed him and trimmed him down to size (using very pointy scissors to keep the edges tidy).  Then, I applied Fray Check to the edges to prevent them from fraying.

Next, I cut two pieces of rectangular blue felt and attached him to the center of one of them with fusible webbing and a steam iron.


Next, I cut five pieces of polyester quilt batting (the stuff that comes in sheets, you can use polyfill if you prefer) slightly smaller (about 1/2" smaller on each side) than the blue squares.  I sandwiched the owl on the inside of the two pieces of felt (you stitch the piece together inside-out - if you are using regular fabric, put the pieces wrong-side out), and I used binder clips to hold the fabric in place. Then, using blue embroidery floss that matched the felt, I stitched a running stitch around three of the sides, leaving one of the shorter sides open so I could flip the piece inside out later.  Leave the needle and thread attached (don't cut them off!) so you can sew the last side.

Binder clips hold the felt together while I work a running stitch along the sides

Leave one side open so you can flip the piece right-side out

Next, carefully flip the piece right-side out.  You can use a chopstick to push out the corners and make them sharp.  Hello, Mr. Owl!  Put the stuffing inside, making sure there aren't any folds or bumps.

Flipped and stuffed!

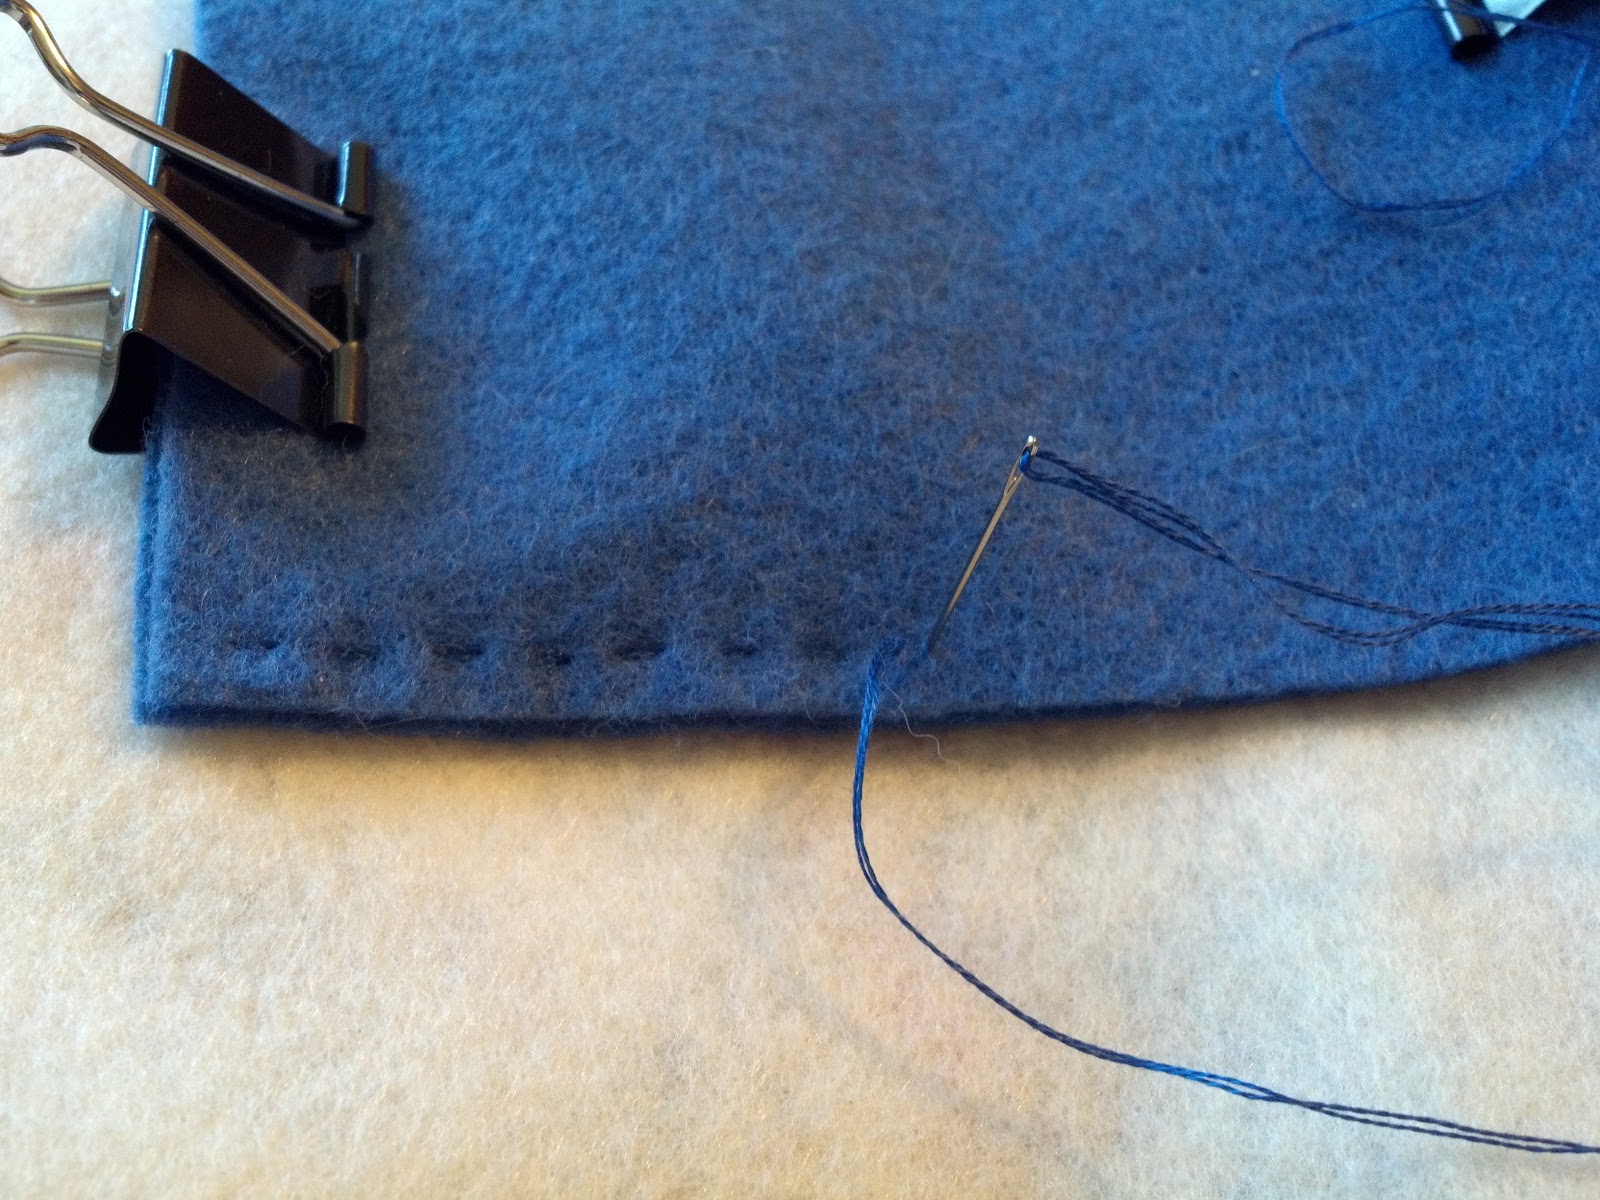
Here is where it gets a little tricky - the buried stitching.  First, take the needle and push it from the outside to the inside of the felt (one piece of felt only) on the open edge.  Then, push it back out from the inside to the outside on the opposite piece of felt.

Stitch from the outside in...

...and then from the inside out.

Now, take the needle back to the opposite side of the fabric, across the edge, and stitch outside-in, inside-out again.

Stitches should go across the seam (two stitches shown)

Once you get a few stitches placed, use a retractable pen or pencil to tuck the fabric edges down into the seam.

Use a pen or pencil to tuck the fabric edges into the seam

After you have placed four or five stitches and tucked the edges down inside the seam, pull the stitches tight so they hardly show.  Then, take the needle and push it through the fabric parallel to the seam on the outside of the piece, about 1/4" from the edge.  It helps if you can get the fabric edges tucked in along the entire seam before you start these stitches - hold it the seam place with your fingers while you stitch.

Push the needle through the fabric, parallel to the seam, on the outside of the piece

Make the next stitch on the opposite side of the seam.  Place the beginning of this stitch slightly before where the last stitch ended, but on the opposite side, so the stitches "overlap" each other as they alternate along opposite sides of the seam (think of how two rows of bricks look next to each other).

Place the next stitch on the opposite side of the seam, overlapping the end of the last stitch

Continue this across the seam until the edge is closed.  The stitches should still be loose at this point.

Continue these stitches across the seam

When you reach the end of the seam, you can use a pencil again to make sure the edges of the fabric are all tucked inside the seam.  All of the stitches should look like this:

Seam closed, stitches still loose

Now, one at at time, tighten the stitches from the beginning of the row to close the seam completely and hide the thread.

Tighten the stitches one by one to close the seam and hide the thread

There!  It's like magic!  That was the hard part.  Now, put the needle back into the seam and tie the loose end to the last stitch to end the thread.  Don't cut the thread yet - we will hide the end later!

Tie the loose end to the last stitch in the seam

Now, this last part is called "smurfing" - it's another technique borrowed from the operating room.   Take the needle, put it back down into the seam, and make sure the point comes back up through the fabric fairly far away from the end of the seam (about an inch or so).  [You can see how the owl's head feather is coming up - I cut a few tiny pieces of fusible webbing to stick under it to fix this.]

Bring the end of the thread through the fabric about 1" from the end of the seam

Cut the thread close to the fabric.  It might leave a tiny tag - if it does, just move the fabric around until the loose end slips back under the fabric.

Cut the thread close to the fabric

The arrow shows my little thread tag - just work the fabric until it slips back under

That's it!  You have now sewn an invisible seam.

To make the hanger, I twisted a cord out of a few of the floss colors used in the design and tacked it around the outside of the piece.

Ta da!  All done!

My cross stitched owl doorknob hanger!

Thursday, May 10, 2012

New Cross Stitch Project - "Celestial Dragon" by Teresa Wentzler

New Cross Stitch Project - "Celestial Dragon" by Teresa WentzlerMy next project is probably going to take forever, but this is such a gorgeous design, and my fiancé has an entire house full of furniture made from re-purposed Asian teak wood, so I am going to try to finish this before the wedding.

Here is a link to the chart, a stunning 13" x 17" monster, and a picture of the model piece:

"Celestial Dragon" by Teresa Wentzler

Daunting, huh?  Well, here goes nothing.

I am going to stitch this beauty over two threads on 28-count antique white Monaco fabric.  It is important to note that there are some errata in the chart, so make sure to check TW's website before starting (she lists the errata for each piece for reference).  Also, there are some specialty materials involved, so here is where you can find them:
In case you are confused, the numbering system for Kreinik threads can be a little problematic.  The braids are described by weight (#4 is lighter than #8, #8 is lighter than #12, and so on up to #32), and the blending filament is a one-stranded metallic thread.  The number at the end is the color code: #002 is gold, and there are various different types (#002V = vintage, #002HL = high luster, #002J = Japan gold).  If you poke around the Kreinik website, you can see what I'm talking about.

First, I whip-stitched the edges to keep them from fraying.  You can just use any spare thread for this.  I used to use masking tape, and whip-stitching takes a little longer, but I don't like the sticky residue the tape leaves on your hands as you work on the piece later.  Here is a piece of the finished edge:

Whip-stitched edge - prevents fraying
For designs like this, I usually stitch the outside border first and make ultra-sure that the dimensions are right before I stitch the inside.  That way, I have a solid, verified reference point for everything in the design.  You can just stitch one leg of each "X" the first time around to save yourself time if you need to remove stitches.  This particular design is wider than my embroidery hoop, so I stitch halfway across the fabric and then place a loose stitch with contrasting floss to mark the halfway point, like this:

Loose placekeeper stitch placed at halfway point to keep track when I move my hoop
When I go back to put the top halves of the "X"s in, I will remove this stitch - it is just temporary to help me count.

I also placed a loose marker "X" in the lower right corner outside of the border (and marked it on my pattern) to keep my piece from being flipped upside down as I work.  It is tough to see, but it's about an inch in from the outside edge of the fabric.

Marker "X" in the lower right corner

Now, I can stitch all around the outside of the design's edge.  Here is what it looks like when I'm done:

Entire edge finished - serves as reference frame for design

For this design, I am going to work one corner at a time until the frame is finished, then I will stitch the dragon in the middle.  So, to wrap up this post, here is a detail of the bottom left corner so far:

Detail of bottom left corner - one color only


Until next time...


Wednesday, May 9, 2012

Welcome to Less Bitching, More Stitching - A Cross Stitch Blog!

Welcome to my cross stitching and knitting blog! Hello, and thanks for stopping by my cross stitch blog!  This is my first venture into the world of blogging, mostly because I wanted somewhere I could post pictures of my multiple works-in-progress (WIPs), share tips for needleworking, network with other crafters, and show off the final products.  I spend most of my crafting time cross stitching, except during the winter, when I tend to knit more often, so expect to see a balance between those two needle arts.

A little bit about me:

  • I am a 27-year-old graduate student, originally from Ohio (Go Bucks!), now living in Boston.
  • For my day job, I am a veterinary resident and a PhD student in biological engineering.  I also do some database work for VIN, a veterinary website.
  • I enjoy crafting, cooking, playing tennis, working out, watching movies, and reading on my Kindle.
  • I have a 6-year-old male neutered orange tabby cat named Orange Julius Caesar (or Julius, for short).
  • I also have an 8-year-old male neutered yellow labrador/springer spaniel mix named Brutus, but he lives with my parents and their two dogs in north central Ohio.
  • I am engaged to a wonderful man who currently lives in Florida.  We are going to be married on June 8, 2013.  I will try to keep wedding planning off of this blog (and contained to my Pinterest page), but no promises.  :)

For you animal lovers out there, here are pictures of my boys:

Brutus
Brutus
Julius
Orange "Julius" Caesar


...and now, let's craft!  :)