Showing posts with label framing. Show all posts

Thursday, January 10, 2013

Happy New Year!

Hello, readers!

Now, I should start this post off by saying that in 2013, I resolve to stitch more.  Toward the end of 2012, I got a little... overwhelmed... with knitting, and I kind of neglected y'all over here because literally ALL I was doing was making brain hats, so... I apologize.  Now that I am caught up on orders, I promise to keep you guys updated with juicy stitching tidbits again!

So, to ring in the new year, I am going to show you my favorite finish of 2012, now that I have had time to get it framed.  Here is "Egyptian Sampler" by Teresa Wentzler!

"Egyptian Sampler" by Teresa Wentzler - finished and framed!
I chose a green and gold frame for this beauty because I liked the way it looks with the papyrus leaf stitching in the border.  I framed this at an awesome shop out in Brookline called The Framers' Workshop.  You take your piece in with you, and the gurus help you pick out a matching frame and matting, etc.  Then, they cut the frame for you, and they show you how to assemble the frame and frame your piece - all by yourself (WAY cheaper than taking it to a traditional frame shop)!  I had a Groupon for $100, so my total for framing two pieces and getting a mat cut for my friend Jenn was about $40 out of pocket ($140 pre-Groupon).

"Two pieces?" you say.  Yes, two - because I also picked out a lovely little whitewashed/distressed frame for "A Day at the Beach."  Here it is!
"A Day at the Beach" by Nikki Leeman - also finished and framed!
The Framers' Workshop is really an awesome place to go for framing, and there were also a bunch of "real" artists there getting their work framed, so it's legit.  :)  My only suggestion would be to go on a weekday if possible - we went on a Saturday afternoon and had to wait in line for about an hour and a half because the employees can only help two customers at once.  But if you are reading this, and you are in the Boston/New England area, you should definitely check it out!

I also received my first Etsy order for the year - and I have been commissioned to stitch a beautiful Santa with a few majestic polar bears!  I am super excited to start this piece, so I will post pics as soon as I receive it from my buyer.  Check back for updates and for progress on my other WIPs - 2012 was a great year for my budding little business, and I am looking forward to 2013!

Until later,
-Erin
Less Bitching, More Stitching!

Sunday, October 7, 2012

Finished - A Day at the Beach (and Some New Frames, Too!)

Hello, readers, and welcome to AUTUMN!

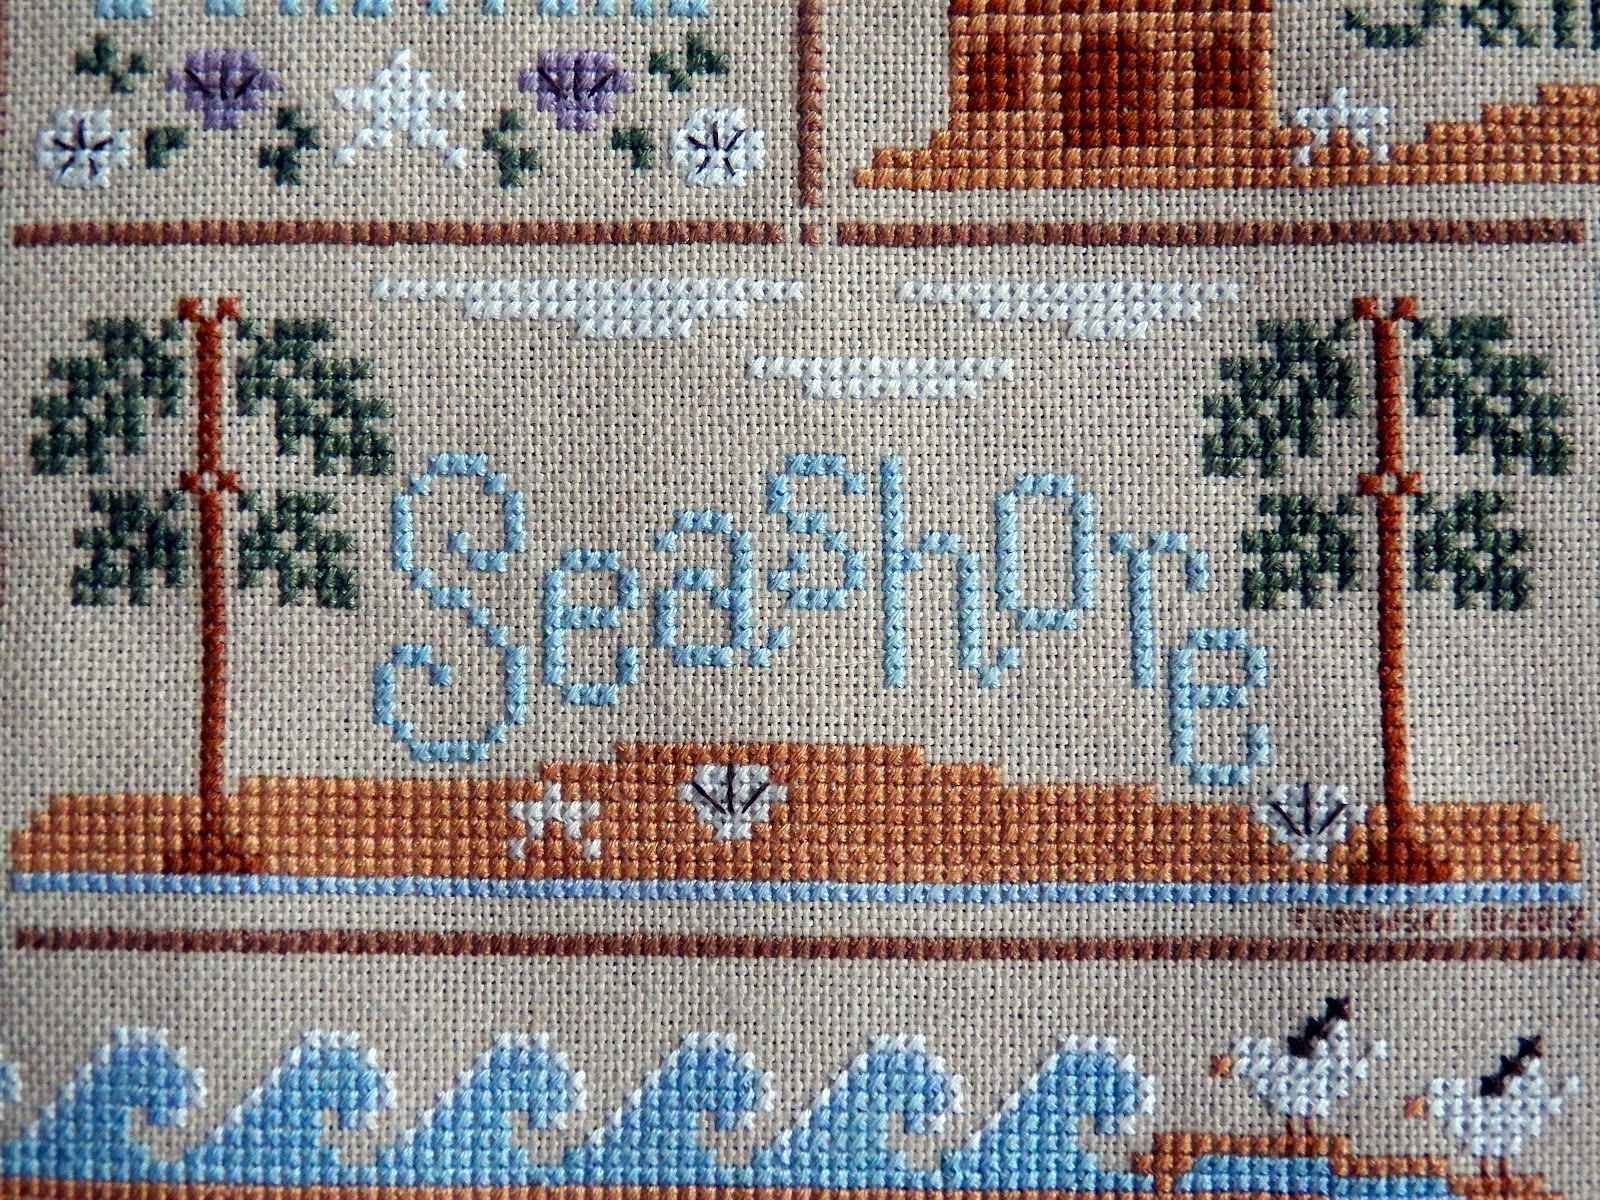
I finally finished my last summer-themed cross stitch piece for the year, and it's about time!  Here is "A Day at the Beach," designed by Nikki Leeman.

"A Day at the Beach" by Nikki Leeman

Close-up of seagulls

Close-up of seashells

Close-up of seashore panel

Close-up of sailboat panel

I stitched this piece over two threads on tan 28-count Monaco fabric.  It measures 6" x 11.5" (15.2 cm x 29.2 cm).  The panels were stitched with three different kinds of embroidery floss: DMC floss, hand-dyed Crescent colors floss, and hand-dyed floss by The Gentle Art.  The hand-dyed threads are variegated, so they give the stitching wonderful depth.  The pattern and floss are available from Stoney Creek.  It may be a little late to start this one this year, but if you are looking for a fun summer piece for 2013, I recommend this one because it stitches up so quickly, and it has a very charming, nautical feel.

I was a busy bee this weekend; I also framed some pieces I had finished previously!  I used the method I posted on Daily Dose of Handmade a while back.  The framed pieces give my Etsy shop a very finished look; it is probably easier to sell something that is "ready to display," as opposed to selling something that people have to frame themselves before it can be hung.  Here is an "after" shot of each piece.

"Twilight Angel"
"Twilight Angel"
"Bee-Wildered Cat"
"Bee-Wildered Cat"
"Butterflies on Nine Patches"

Each of these frames was only $1 from Goodwill, and they are solid pine and include mounting fixtures.  The last piece I had custom mounted and framed cost almost $30, and it was only about 6" x 12".  If you are framing a piece that is a standard size (4" x 6", 5" x 7", 8" x 10", etc.), it is really worth it to track down an inexpensive frame and frame it yourself.  Unfortunately, "A Day at the Beach" is not a standard size, so I will probably have to make a frame for it myself.  But that is a blog entry for another day...

Until next time, happy crafting!  Thank you for reading and for commenting.

-Erin

Wednesday, August 29, 2012

Back after a looooooong break!

Hello, readers!  First, my sincerest apologies: it has been approximately one month since I last updated.  I have been super busy!  I have been spending a TON of time working on my thesis proposal, and it has literally sucked the life out of me.  I have been stitching, but not blogging!  So, here is a long overdue update.

First of all, I spent a week in Kiawah Island, South Carolina with my fiancé and his two daughters.  We stayed at a lovely beach resort.  I stitched, I sunbathed, and I RESCUED BABY TURTLES!  There is a group of volunteers that goes out every morning at 7 a.m. to check loggerhead turtle nests on the beach and make sure any stragglers are able to get out of the sand.  The nests are about a foot and a half deep, so getting out can be a challenge.  When the volunteers found out I am a vet, they invited me back to help out next year!  I am stoked already!  Oh, my gosh, the babies were so cute - here is a picture of one of them.

Hatchling loggerhead sea turtle
And, of course, while I was on the beach, I stitched away on "Christmas on the Beach."  It is almost done - I just have a teeny bit of sky and all of the backstitching left to do!  Here is how it looks so far.

"Christmas on the Beach" from the Dimensions Gold Petites collection
I also collected a bunch of seashells from my beach vacations this summer.  My plans for them are to put "Christmas on the Beach" in a wooden frame and paint the frame white, then glue white seashells all around the edge, and maybe brush them with a tiny bit of gold paint for an accent.  Maybe something like this.

Seashell picture frame idea
I still haven't started the other beach pattern I bought ("A Day at the Beach" by Nikki Leeman), and I haven't decided yet if I will stitch that one this year or turf it until next year and start on Christmas projects instead.  Oh, and I still have "Celestial Dragon" and "All Things Bright and Beautiful" to finish, too.  So many projects, so little time.

The good news is, I have inspired three of my dearest girl friends up here in Boston to start cross stitching, too!  A few of you have said that you are happy to see someone in the "younger" crowd picking up needlework, so consider this me doing my part to keep the craft alive!  I am really happy that the four of us will be able to get together and stitch - previously, our crafting nights usually consisted of me cross stitching and the other three girls knitting, but I am really excited to have started a trend.  :)

I have a couple of what I like to call "stitching trips" coming up, too.  This is when I am stuck in some sort of conveyance traveling somewhere, so I hope to be able to get a lot of stitching done.  The first stitching trip is this coming weekend, when I will be moving my fiancé to Houston (!) for his new job.  He lives in West Palm Beach right now and we have been long-distance engaged since January, so it's not too much of a change (well, not for me, anyway).  It's about an eighteen-hour drive between West Palm and Houston (plus the flight back to Boston), so I will be diligently navigating and stitching away.

My first stitching trip - moving my fiancé to Houston
The second "stitching trip" is a little more... complicated.  First, I have to admit that I really enjoy air travel (despite the TSA's best efforts to convince me otherwise).  I have Silver Medallion status on Delta and am trying to maintain it through next year, so I needed a few extra SkyMiles to bump me over the threshold.  So, I snagged a cheap fare from Boston to Oakland, CA for about $260 round trip, and I will be flying from Boston to Detroit, to Salt Lake City, to Oakland, to Los Angeles, to Detroit, and back to Boston, all in the span of about twenty-five hours over one looooong Saturday/Sunday.  I will definitely be blogging about that trip - 5800 air miles of cross stitching!  Yikes!  :)

Oh, and for a closing thought... completely random, but worth sharing... well, I think it's safe to say that a lot of my readers (myself included) enjoy cats, so I found this really awesome infographic that explains all of the possible color combinations for cats.  My own kitty, Julius, is a red tabby with grade 2 white spotting ("white" nose and toes, which are in reality pink, instead of brick red like they should be with a red tabby).

Orange and tortoise shell kitties - my Julius is a red tabby
Orange and tortoise shell kitties - my Julius is a red tabby.
If you have a kitty, try to find its color on this table!  You may want to view the full-size graphic here.

Every cat color you could ever imagine...
Okay, if you actually read through all of this, thank you very much for sticking around.  I am sorry I was gone for so long - things should be back to usual after this hectic month!

Cheers!  :)

-Erin
Less Bitching, More Stitching

Monday, July 9, 2012

Tutorial - Framing Your Cross Stitch Using Random Stuff (in This Case, a Jewelry Box Lid)

Ohhhh, Monday.  My crafting weekend was so productive - I knit a bunch of pieces, I added a super-soft lap blanket to my Etsy shop, I re-photographed some dish cloths, I worked on the dragon, and I designed a new veterinary-inspired embroidery project.  Now, I have to go back to my desk job!  :(

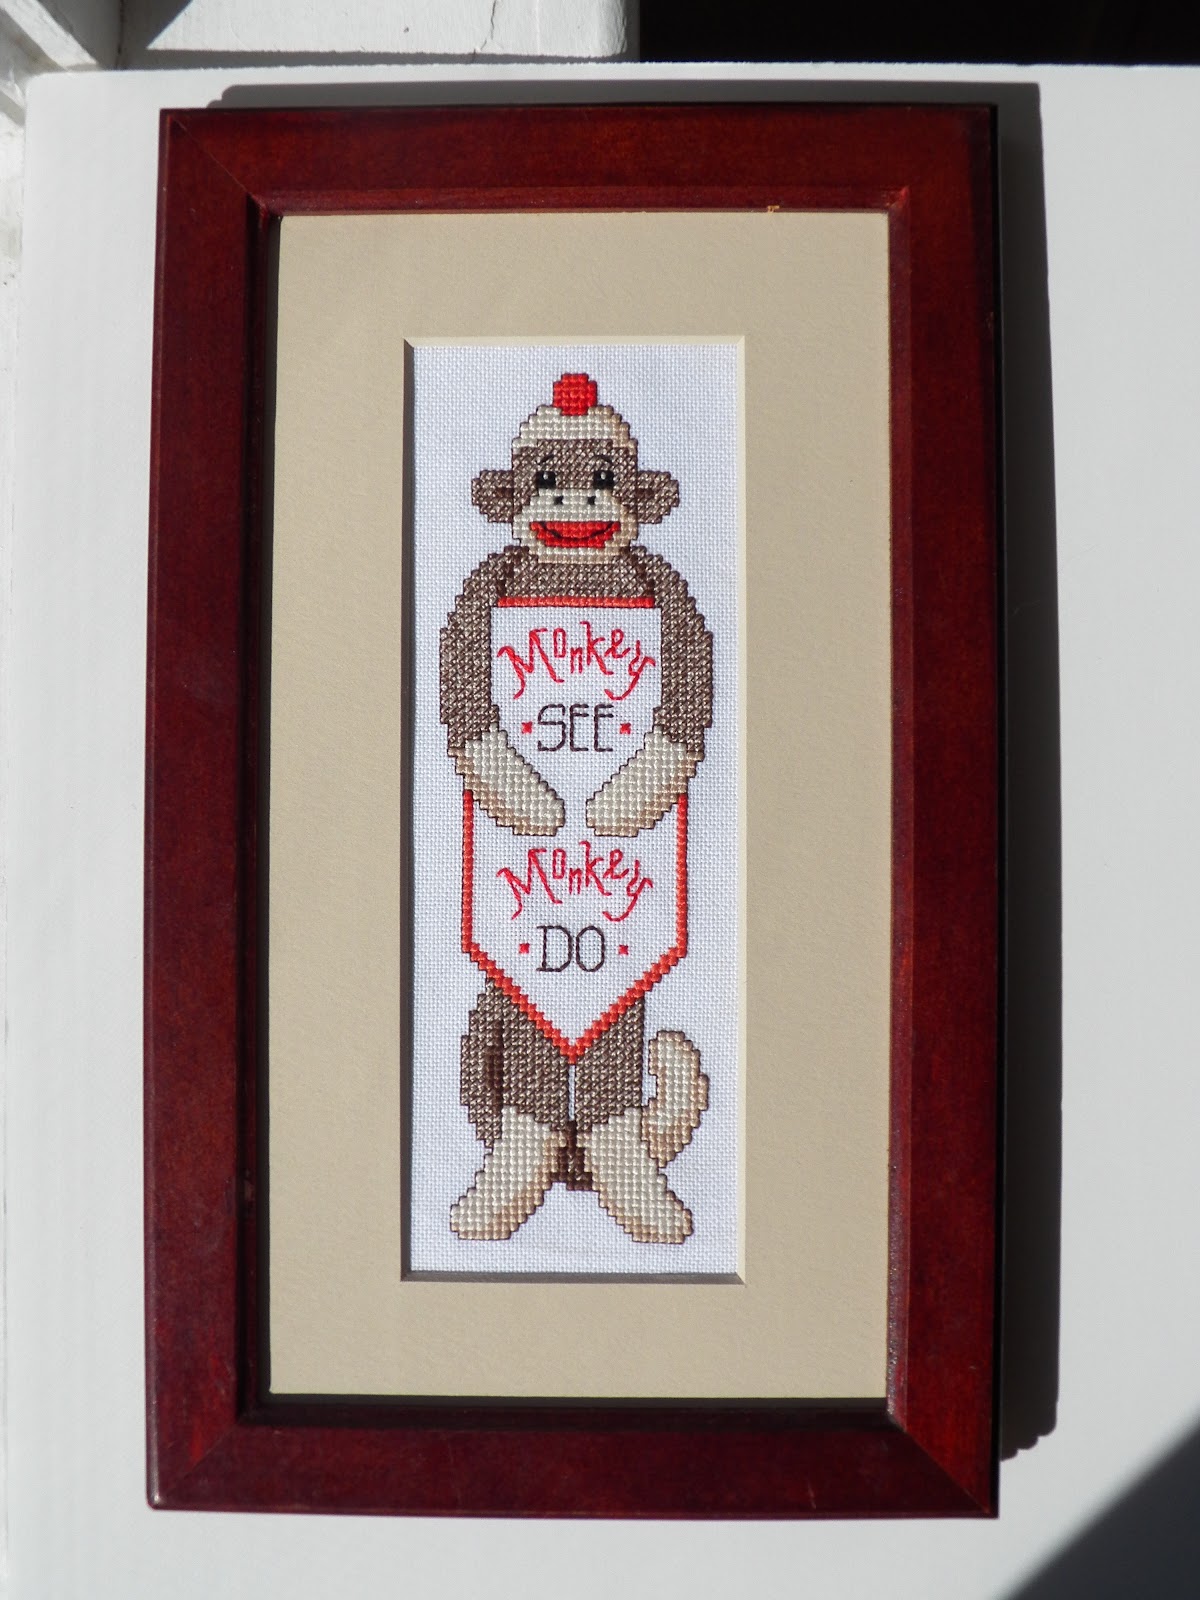
However, I wanted to finally get this tutorial posted.  As you might recall, I finished a cross stitched sock monkey some time ago that was originally intended to be a bookmark, but I decided to frame him instead because he was just so darn cute.  Unfortunately, because he was so long and narrow (you know, like most bookmarks are), it was tough to find a frame that would fit him.  I was having trouble justifying spending beaucoup d'argent on a custom-made frame for such a small piece, so when I found a jewelry box at Goodwill that looked to be about the right size, I decided I would try to turn it into a picture frame.  And - it worked!  Here's how I did it.

Here are "before" pictures of the jewelry box and the monkey.  (Hey, 1985 called - they want their jewelry box back!)


The jewelry box lid comprises the following layers, from outside in: a wooden frame, tapestry and padding, a backboard, a layer of glue, and a mirror.  So, the first order of business was to remove the mirror from the inside of the lid.  Disclaimer: you may want to wear leather gloves and goggles for this part.  I removed the mirror by sticking a table knife under the mirror and gently prying it from the backboard.  DO THIS SLOWLY AND CAREFULLY!  If you are not patient, you could shatter the mirror and really screw up your hands (or eyes, hence the safety disclaimer above).  This jewelry box was probably about 20 years old, so the glue was not quite as strong as it might have been 20 years ago (thank God).


This view shows the glue attaching the mirror to the back board and how I carefully used the knife to pry off the mirror.  You are looking down between the back board (top, light brown) and the mirror (bottom, blue-ish), parallel to the long axis of the jewelry box.


A word of caution: the glue was very difficult to remove from my shiny table knife after I finished removing the mirror!  You may either want to use an old piece of flatware that you can throw away or make sure you have some kind of solvent (paint thinner, maybe?) around to help remove the glue if you are using a "real" knife.

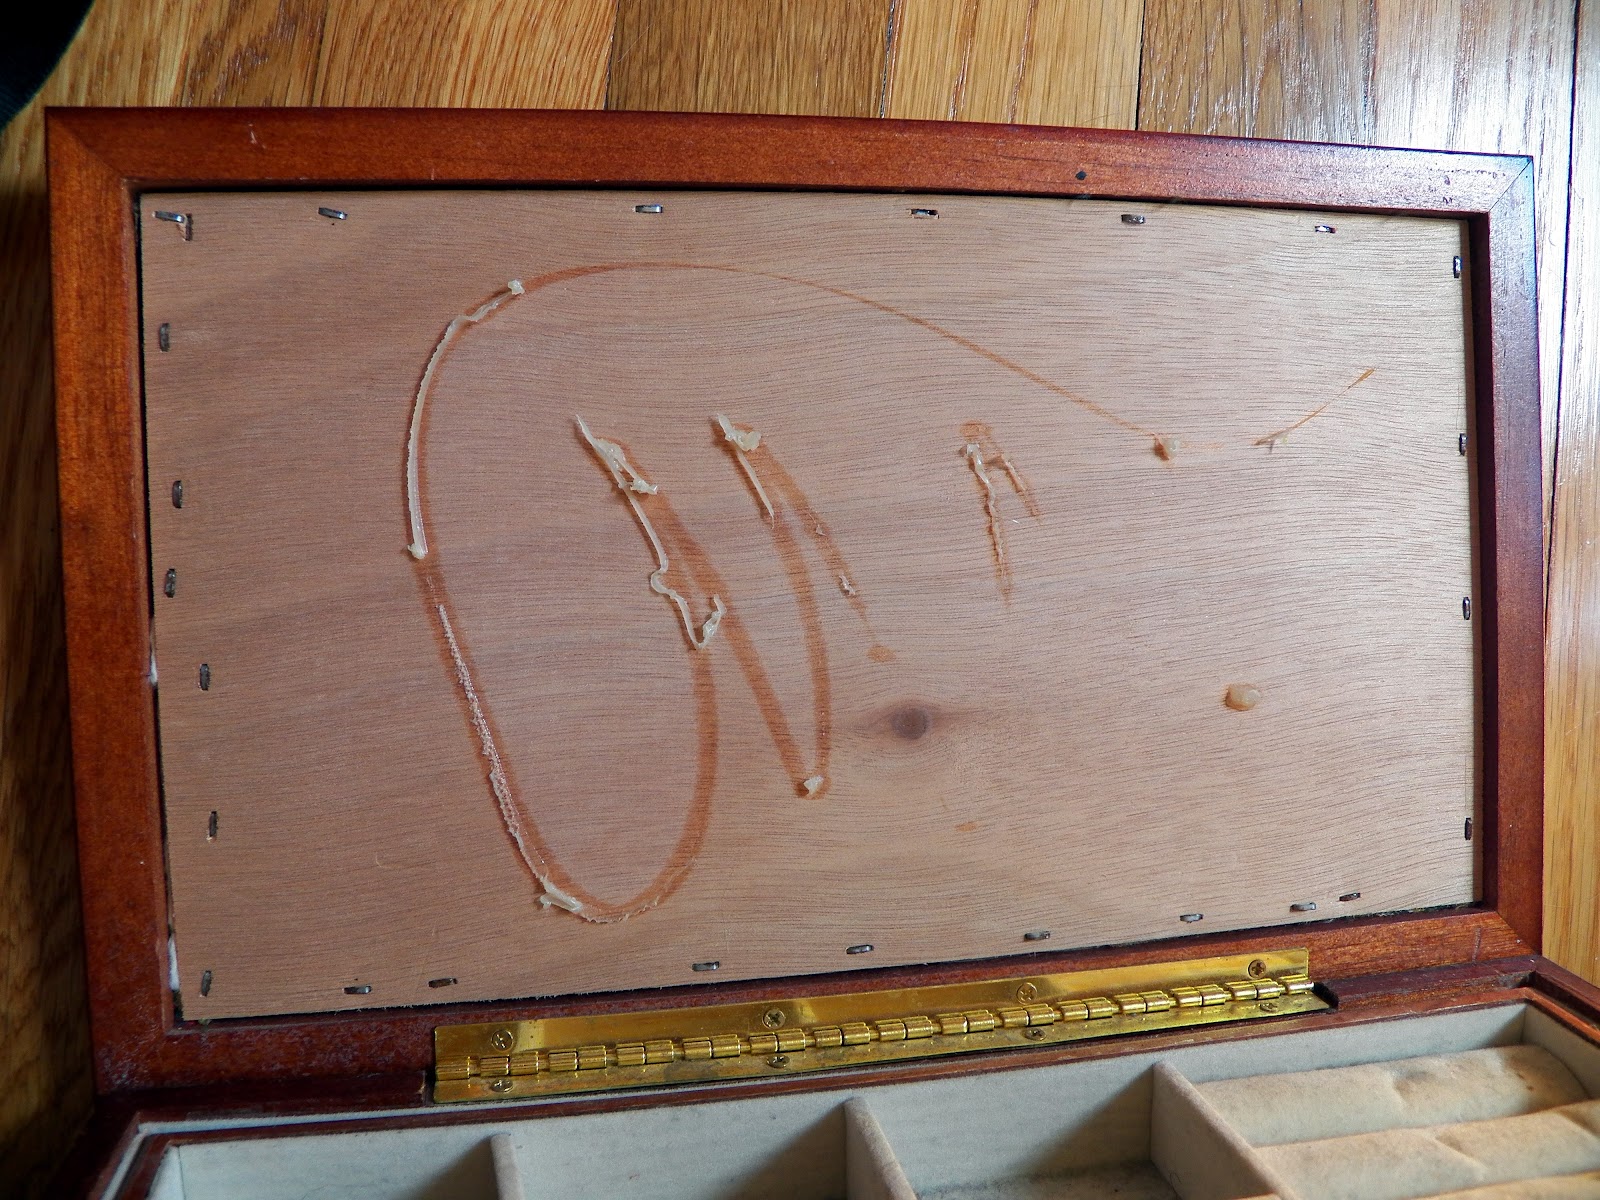
Here is what the inside of the lid looks like without the mirror.  This is the back board - you can still see remnants of wood glue.


You can see staples around the edge of the back board.  These staples go through the back board, the padding, and the tapestry fabric, attaching all of the layers to the inside edge of the frame.


I removed the back board and the tapestry and padding by gently pressing around the outside edge of the frame (i.e., pressing the fabric down into the jewelry box from the outside) to release the staples.


You can see the cross section here: the tapestry fabric and the padding are sandwiched between the back board (top, yellowish) and the frame (bottom, red-brown).


Some staples pulled through the fabric and the back board, so I used pliers to remove them from the frame.


Finally, I used a Phillips-head screwdriver to remove the hinge from the lid.


Ta da!  Here is what the "naked" frame looks like, once the mirror, back board, tapestry fabric, staples, and hinge have all been removed.


I cut a piece of acid-free foam core that was 1/4" smaller on each side than the back opening of the frame.  I usually like to stretch my finished cross stitch pieces and mount them on foam core using thread, but I didn't have enough excess fabric to do that with this piece and still use this frame, so I used acid-free double-sided tape to attach the piece to the foam core instead.


I splurged and had a mat cut to fit the frame to cover up the edges of the fabric.  Then, I attached framing clips and a wire to the back of the frame so he could hang on the wall.  Aaaaaand... here is the finished product!


I think he looks quite adorable!  :)

So, there you go!  For small or irregularly shaped pieces, it really makes a lot of sense to try to find frames wherever you can, instead of paying to have a frame shop make a custom frame for you.  Maybe you will find a frame in an unexpected place, too!

Thanks for reading and for all of your thoughtful comments.  I hope this little project breaks up the monotony of your Monday!

-Erin
Less Bitching, More Stitching!

Sunday, June 24, 2012

My Framing Tutorial Was Featured on Daily Dose of Handmade!

Hello, readers!  Check out today's newest post over at Daily Dose of Handmade (DDH) - I created a framing tutorial, and it has been featured as Sunday's Guest Blog article!  It includes step-by-step instructions for mounting your finished needlework pieces and fitting them to a frame.  Many thanks to Julie and Cylene at DDH for this collaborative project.  Check it out!

"Beautiful Bird" - and how to frame it - over at DDH!
As promised, I will have another tutorial posted here at Less Bitching, More Stitching! later this week.  That tutorial will show you how to make a frame out of a jewelry box.  Keep an eye out over the next few days - it should be finished soon.

We have had a few people join the blog since my last post - so welcome to our new readers!  Thank you for subscribing; I am glad to have you here!

I hope you are all having a wonderful weekend!

-Erin

Wednesday, June 6, 2012

Next up - "The Finery of Nature" and a home for Mr. Sock Monkey

I got a new project in the mail yesterday - "The Finery of Nature," a kit in the Dimensions Gold Collection, modeled here by the ever-handsome Julius.

"The Finery of Nature" (and Julius)
"The Finery of Nature" kit (and Julius)

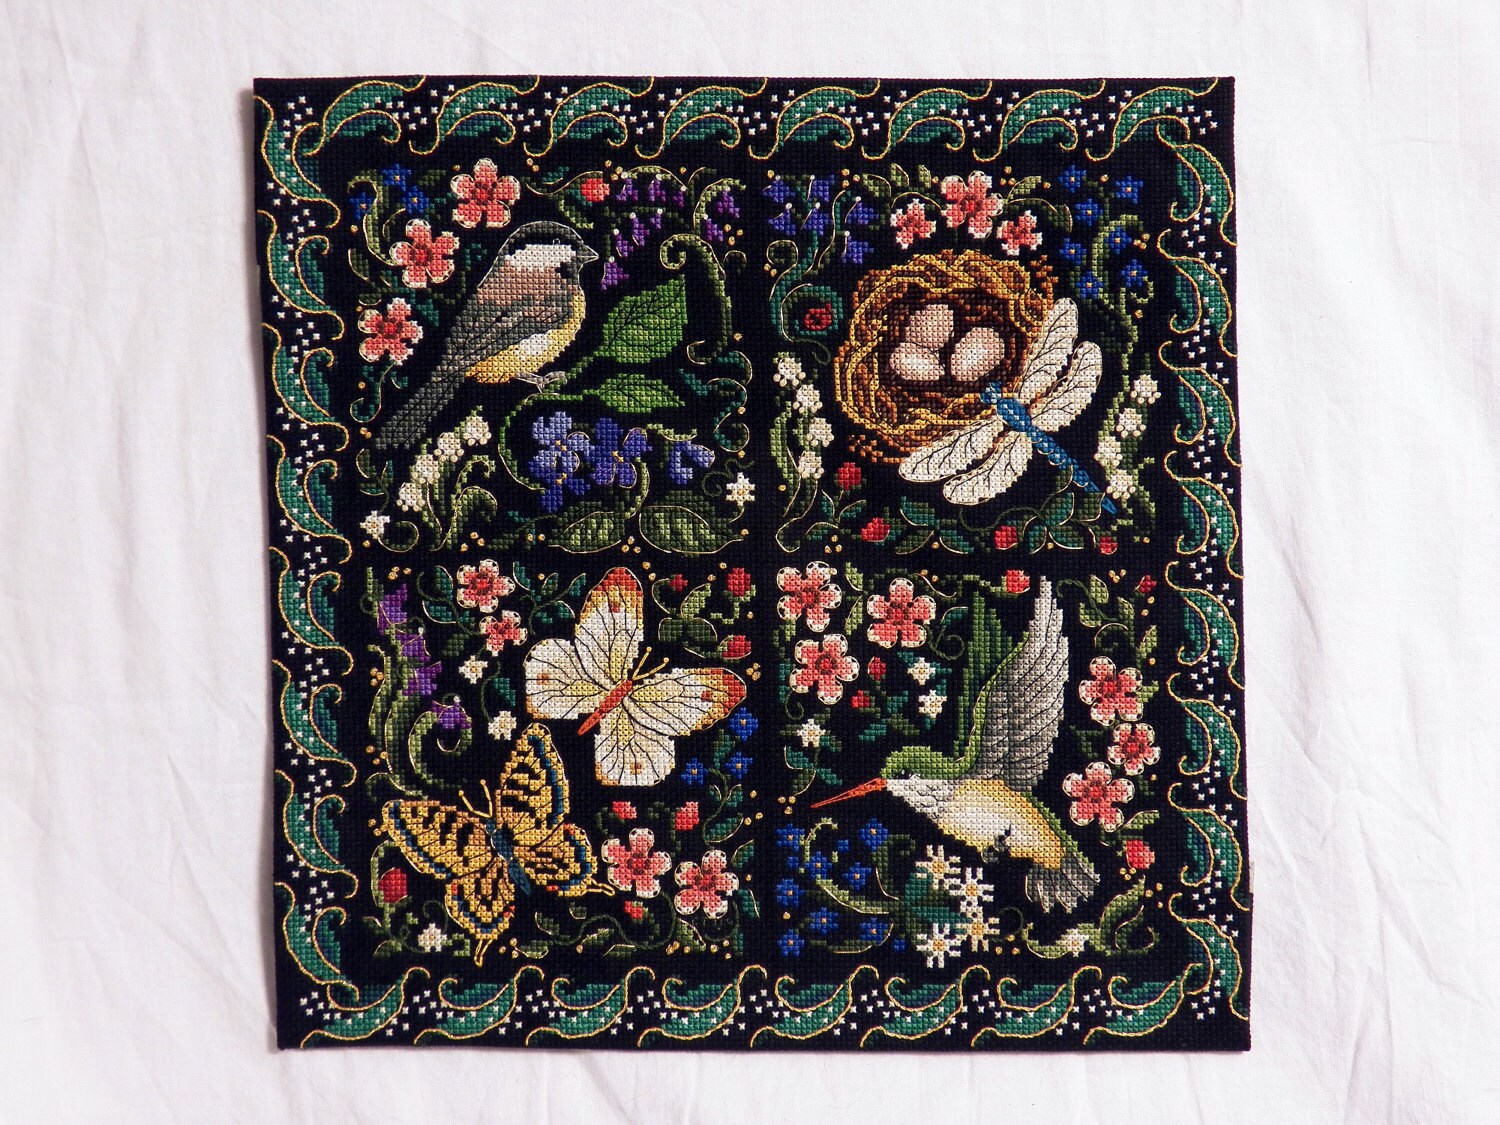
The interesting thing is that I have already stitched this piece once (from a different kit), but it has since been discontinued, and I can't find my original pattern.  I LOVE this pattern - the colors are so pretty! - and I found this kit for a really reasonable amount online (around $13), so I just had to snatch it up so I could stitch it again!

Here is the piece I have already finished:

"The Finery of Nature" (minus Julius)

Now, as you can see, the piece is divided into four square panels.  You can see close-ups of the panels on Etsy.  So, to mix it up this time, and because I think each panel is very pretty in its own right, I am going to stitch the panels individually instead of stitching the entire large piece.  I think the panels would look quite nice framed by themselves!

Speaking of framing, I think I have found something to do with my cross stitched Sock Monkey!  Because he is such a weird size (7.5" x 2.5", or 22.5 cm x 6.3 cm for you metric folks), I was looking at probably having to have him custom framed.  But then... I found something at Goodwill that just might work!

Retro jewelry box with a tapestry lid - $7.99 from Goodwill

Oh, yes, that is a glorious cherry wood jewelry box with a tapestry lid.  You know you love it - but look how well he fits in it!

The jewelry box lid is the perfect size for my sock monkey!

Framing him is going to still require a custom mat and probably some creative mounting, and I also have to figure out how to remove the mirror from the inside of the lid without slicing off any fingers.

Mirror inside the jewelry box lid

However, if I can get it to work, it will be perfect!  For $8, I had to give it a try.  :)  I also picked up a few brand new solid oak 5" x 7" frames (with glass) that I can use for my smaller pieces - only $1.99 each!  Gotta love Goodwill!

Still not much to report on Celestial Dragon.  I promise to make some headway on it this upcoming weekend and take pictures!

I am also working on a piece for EtsyNEAT's May/June needlework challenge, but I'm not posting any pictures until I finish my piece and enter it into the contest.  It is coming along quite nicely - lots of specialty stitches and bold colors.  :)

And, finally, in the near future, I want to buy some foamboard and make a framing tutorial, now that I have frames and a few 5" x 7" pieces to frame.  Keep an eye out for that in the next few weeks.

Thank you everyone for all of your wonderful comments on my last post!  Hopefully I am keeping you entertained in my little corner of the Internet.

Until next time...

-Erin
Less Bitching, More Stitching!